Create a Form in Microsoft Access 2013
As mentioned, Access forms provide non-technical users the ability to add data to your database. Forms also make it easier to insert data across multiple tables.
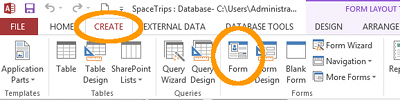
There are several methods to create a form (as you can see by the following screenshot):

Options include using the Form Wizard, Design view, and even starting with a blank form. The option you choose will depend on your own preference and perhaps the type of form that you want to create. The Navigation option is for creating a form that allows the user to navigate database objects such as other forms. The Form Wizard option steps you through the process of creating a form. If you use the Form Wizard, you can always modify the form later using Design view.
For the purposes of this tutorial, we'll create our form as quickly as possible. Then we'll go back and modify it later. Here's the quickest way to create a form in Access.
- Ensuring that the Customers table is selected (in the left navigation pane), from the Ribbon, select CREATE > Form
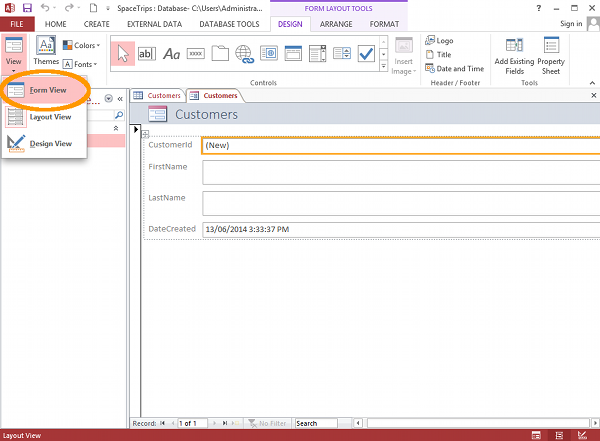
- Access has just created a brand new form in Layout view, based on the fields in the Customers table. Click on the inverted triangle under the View icon and select Form View:
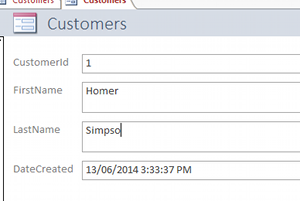
- This is how the user will see the form. Go ahead and enter data into the FirstName and LastName fields. Be sure to hit Enter after you've entered the last name. Then hit enter again to add another record.
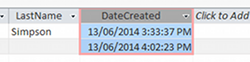
- Now let's check our table. Click Customers in the left navigation, then click Refresh All on the Ribbon. You should now see your newly created record in the table:
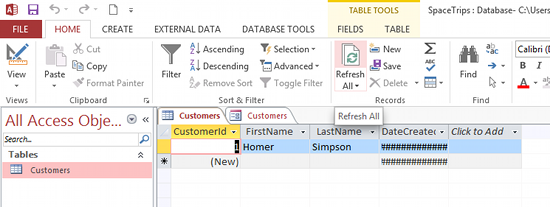
You might notice that the DateCreated field is full of hashes symbols ######. This is because the column is currently too narrow to display the data. You can resize the column to fit the data by double clicking at the side of the column header. First, move the cursor to the edge of the column header until it changes appearance into a resize tool, then double click. The column should now be wide enough to display the data:
Now let's switch back to the form and save it.
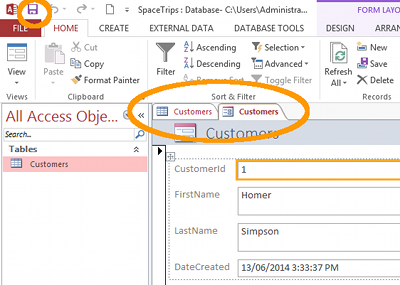
- Click on the second tab called Customers (the first one is for the Customers table), then click the Save icon in the top left (above the Ribbon):
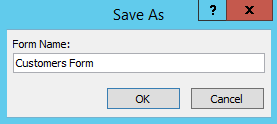
- Rename your form Customers Form when prompted:
The form will now appear in the left navigation column under the heading Forms.
Next, we will switch to Design view and modify our form.
There's also a tutorial for Access 2016.