Install SQL Server on a Mac
Install SQL Server directly to your Mac — no virtual machine required!
Microsoft has made SQL Server available for macOS and Linux systems. This is made possible by running SQL Server from a Docker container. Therefore, there's no need to install a virtual machine with Windows (which was the only way to run SQL Server on a Mac prior to SQL Server 2017).
Install and Configure Docker
This is a prerequisite for installing SQL Server on your Mac. Because the Mac runs SQL Server inside a Docker container, the first thing we need to do is download and install Docker (unless it's already installed). Once installed, we'll increase its memory allocation to a more suitable level for running SQL Server.
- Download Docker from the download page, extract it, and drag it into your Application folder.
- Launch Docker, and go to
Preferences > Advancedand increase its memory allocation to 4GB
If I've confused you, don't worry. I've written a tutorial with screenshots: Install Docker on a Mac and Configure for SQL Server.
OK, we're now ready to install SQL Server on your Mac.
Now the Actual SQL Server Installation
Now that we've installed Docker and increased its memory allocation, we can go ahead and install SQL Server. The Mac uses the Linux image (the SQL Server for Linux Docker image).
-
Pull the SQL Server Image
Open a Terminal window and run the following command:*
This pulls the latest SQL Server for Linux Docker image to your computer.
-
Launch the SQL Server Image
Run the following command to launch an instance of the Docker image you just downloaded:
Replace the container name and password with your own. Also be sure to make a strong password, or you may get an error (see below).
Also, if you downloaded a different container image, replace
microsoft/mssql-server-linuxwith your container image.Here's an explanation of the above parameters:
-d- This is an optional parameter that launches the Docker container in daemon mode. This means that it runs in the background and doesn't need its own Terminal window open. You can omit this parameter to have the container run in its own Terminal window.
--name Homer- This optional parameter provides a name for the container. This can be handy when stopping and starting the container from the Terminal.
-e 'ACCEPT_EULA=Y'- The
Yshows that you agree with the EULA (End User Licence Agreement). This is required in order to install SQL Server. -e 'SA_PASSWORD=myPassw0rd'- Required parameter that sets the
sadatabase password. -p 1433:1433- This maps the local port 1433 to port 1433 on the container. This is the default TCP port that SQL Server uses to listen for connections.
microsoft/mssql-server-linux- This tells Docker which image to use. If you downloaded a different one, use that instead.
-
Check the Docker container (optional)
Type the following command to check that the Docker container is running.
If it's up and running, it should return something like this:
CONTAINER ID        IMAGE                          COMMAND                  CREATED             STATUS              PORTS                    NAMES
740fcb5193c6        microsoft/mssql-server-linux   "/bin/sh -c /opt/m..."   33 seconds ago      Up 31 seconds       0.0.0.0:1433->1433/tcp   Homer
Check your Installation & Manage SQL Server
Now that you've installed SQL Server on your Mac, you'll probably want to check that you can access it and query it, etc. Then you'll probably want to start creating databases and doing other DB-related tasks. You'll need some sort of management tool for this.
Here are three options:
-
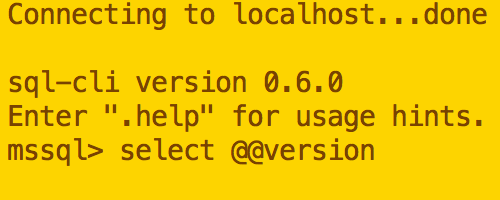
sql-cli
sql-cli is a cross platform command line tool for SQL Server. This means you can create databases and query them right from your Mac's Terminal window.
Installation is as easy as running a single command (assuming you already have NodeJs installed).
-
Azure Data Studio
Azure Data Studio (formerly called SQL Operations Studio) is a free GUI tool from Microsoft. It's a bit more user friendly for those who aren't comfortable with the command line interface.
Installation is as easy as downloading it and dragging it to your Applications folder.

-
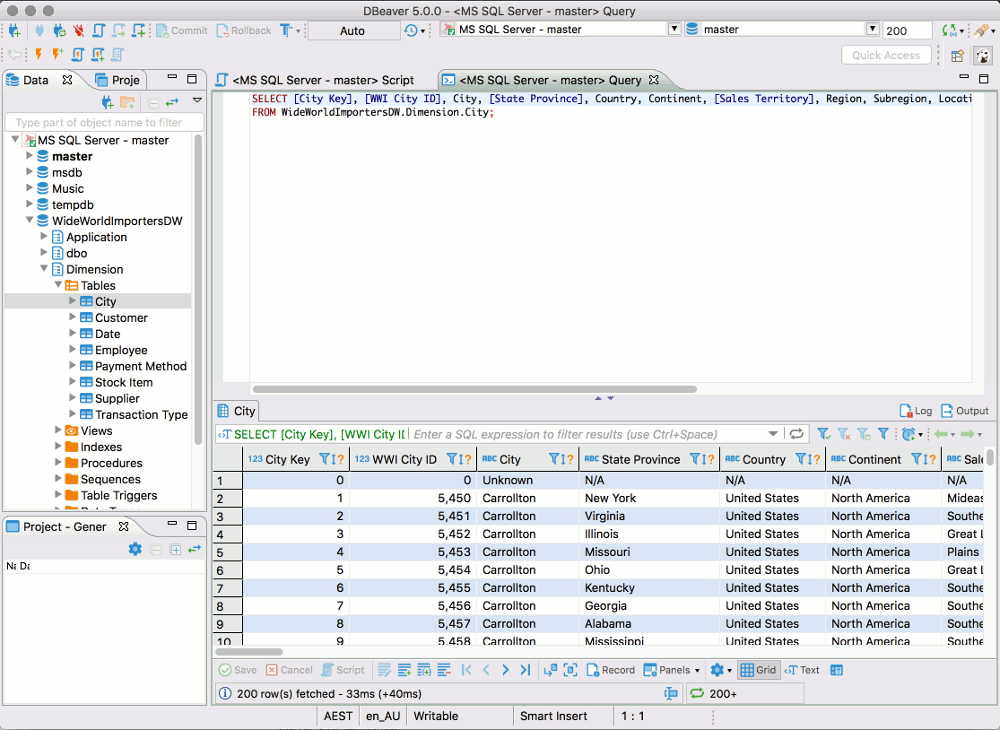
DBeaver
Another GUI option is DBeaver. DBeaver is a free open source database tool that works with many different database management systems (MySQL, PostgreSQL, MariaDB, SQLite, Oracle, DB2, SQL Server, Sybase, MS Access, Teradata, Firebird, Derby, etc).
You have a few options for installing DBeaver. The easiest way is to download the "installer option", and then run the installation wizard.