Create a View in SQL Server 2017
In SQL Server, you can save a query as a view. Views are beneficial for many reasons, including security, usability, and convenience.
In SQL Server, a view is a virtual table whose contents are defined by a query. It is basically a pre-written query that is stored on the database.
A view consists of a SELECT statement, and when you run a query against the view, you see the results of it like you would when opening a table. Views are referred to as virtual tables because they can pull together data from multiple tables, as well as aggregate data, and present it as though it is a single table.
Benefits of Views
A view can be useful when there are multiple users with different levels of access, who all need to see portions of the data in the database (but not necessarily all of the data). Views can do the following:
- Restrict access to specific rows in a table
- Restrict access to specific columns in a table
- Join columns from multiple tables and present them as though they are part of a single table
- Present aggregate information (such as the results of the
COUNT()function)
How to Create a View
To create a view, use the CREATE VIEW statement, followed by the SELECT statement.
CREATE VIEW ViewName
AS
SELECT ...
That's all there is to it. When you run that statement, the view is saved to the database
Example
Here's an example of creating a view and then selecting data from that view.
-
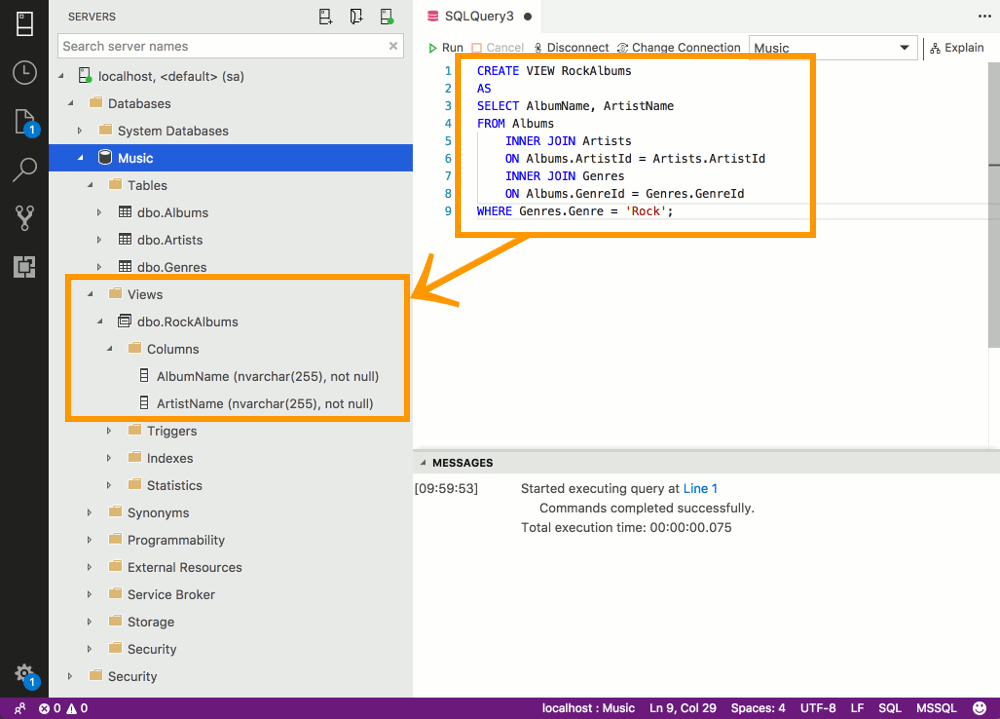
Create the View
Run the following statement against the Music database that we've created throughout this tutorial.
This example creates a view called RockAlbums. It selects all albums that have been assigned a Genre of "Rock".
-
View the View
Expand the Views node under the applicable database to see your newly created view. You can also expand the view's nodes to see the columns that are included in its definition.
-
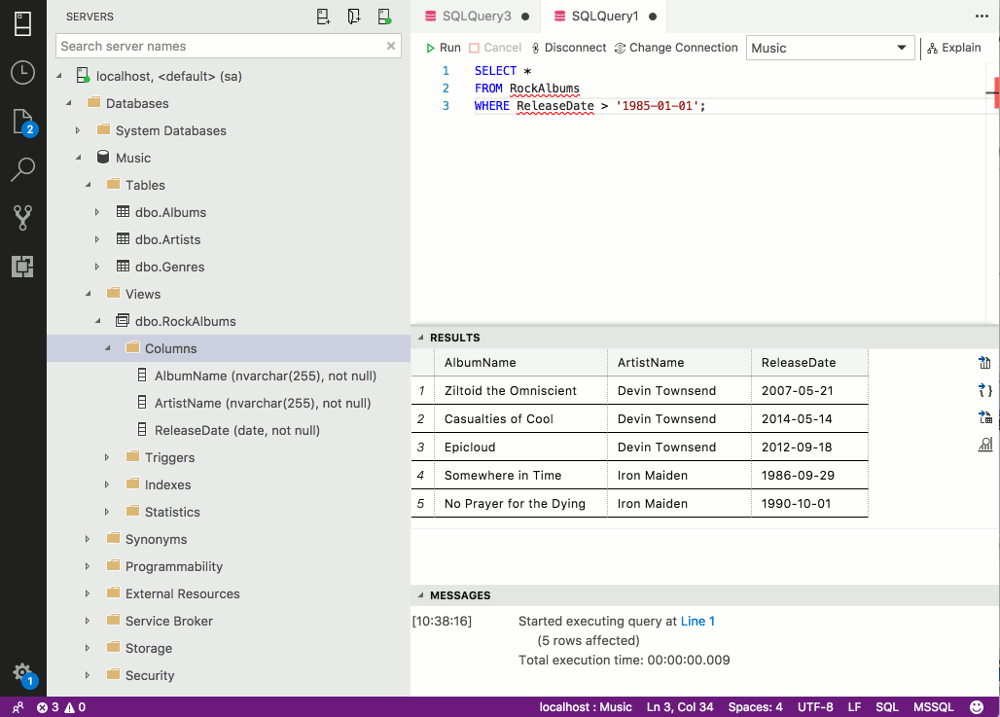
Run the View
Now that the view has been created, you can run it by using a
SELECTstatement. You can select everything, or you can select specific columns, narrow the results further with aWHEREclause, etc.
Alter a View
You can modify your view with the ALTER VIEW statement.
All you do is provide the new view definition that you'd like to use. So it's almost like creating a new view with the CREATE VIEW statement except it's altering an existing one with the ALTER VIEW statement.
Here's an example.
-
Alter the View
Run the following statement. This adds a new column to the view's selection (the
ReleaseDatecolumn). -
Run the View
Now that we've added the
ReleaseDatecolumn to the view, we can use that in our SQL queries against the view.For example, we can select all albums where the release date is after a certain date.